[ExpertPhotography is supported by readers. Product links on ExpertPhotography are referral links. If you use one of these and buy something we make a little bit of money. Need more info? See how it all works here.]
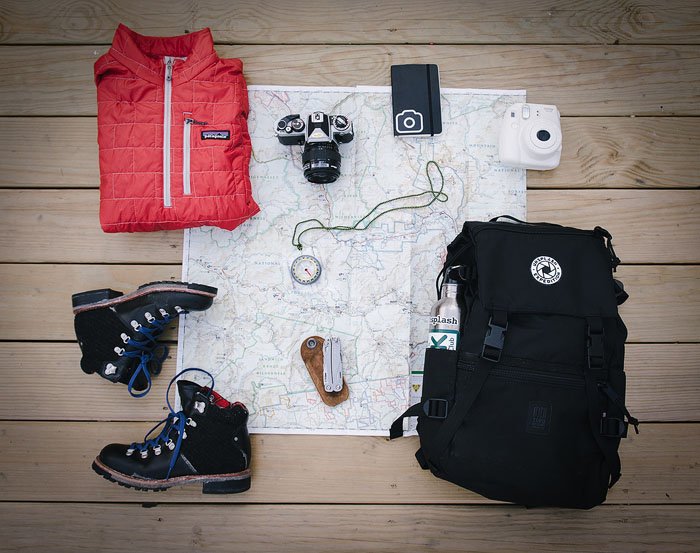
Landscape Photography Clothing and Photography Accessories
The right clothing is essential. You need to carefully select your items so that you can be outdoors for an extended time without your jacket or base layer bothering you. For landscape photography, you’ll need to prepare nearly all items from socks to the hat.
The Layering System
The smartest way to dress is to wear three layers of clothing. The weather can change fairly quickly. This way you’ll be able to add or remove layers as necessary. Also, the system itself is very flexible and has a massive capacity so that you won’t need to remove or add layers every 5 minutes. The bottom layer removes sweat, the middle layer keeps warmth and continues to remove moisture, and the outer layer must be wind and rainproof for the best protection. There can also be a shell layer on top to improve wind resistance.
Base layer
Base layer plays a significant role in overall thermodynamics. It has to be able to remove sweat efficiently, to breathe and to dry quickly. It may sound counter-intuitive, but cotton tees won’t work here. When you start sweating, they get soaked immediately and stay this way for hours. The performance tees, on the other hand, have all the qualities we need. Always choose a synthetic, tight tee. It will keep you dry and fresh. These tees are available in both short or long sleeves.
Middle layer
This layer is designed to keep you warm. When it’s cooler outside, the best option is a fleece jacket. There are also some synthetic jackets too. The rule of thumb is to pick something you’d typically wear for an autumn walk.
Outer layer
The outer layer is critical. It must be rain and windproof. And it is best to have some breathable material for your jacket. It may be a good idea to get clothes 1-2 sizes larger than yours. You’ll have two layers underneath, and it also should be a little loose.
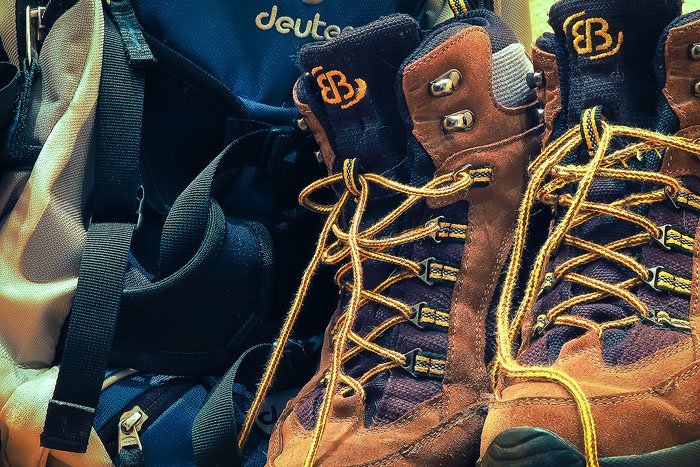
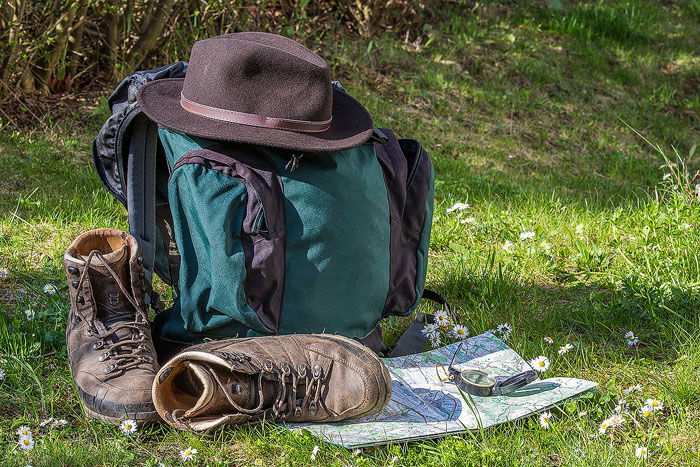
Hiking boots
If you ask me about a single most important piece of clothing, I will pick boots. It’s hard to overestimate the importance of quality footwear when it comes to hiking. They can save you from so many injuries, including sprains and dislocations. Moreover, you’ll be carrying a considerable weight in photography equipment. This increases the overall load on your muscles and joints. You cannot just blindly pick some good looking shoes; there are a few rules and factors to consider. There are three types of boots to choose from:
How to choose hiking boots
There is an alternative to both Gore-Tex and Vibram by the Columbia brand. I tried one of these on my recent trip and was pleasantly surprised.
Pants
I prefer to get some hiking pants with large loose pockets. You need to be able to put and fetch things fast without losing any extra second. I mean the remote controller, lens cap, microfiber cloth, etc. Regarding the material, the best ones are breathable synthetic lightweight pants. They shouldn’t sit tight. For my last hike, I bought Decathlon pants, and they were excellent. You may also need thermal underwear in case it gets cold. For the summer, I usually just wear some shorts (if I don’t go far or through the bush).
Jackets For Photographers
Regardless of whether you want it or not, you’ll sometimes be out there in the rain. Doing landscape photography in bad weather is challenging, but rewarding. You need a good rain jacket or coat to stay warm and comfortable and be able to focus. A good rain jacket will be made of nylon and polyester. The brands to looks for are Columbia, Decathlon, and many others. It should have a breathing net inside so that it doesn’t stick to your body during the rain. And the hood should be deep enough to cover all of your head.
Landscape Accessories – Clothing
Hiking Socks
It may look like the socks aren’t essential, but it’s not the case. Socks are vital for a good hike! A free or wrong size sock will cause blisters and sore feet. While a proper hiking sock supports your feet and improves the overall body fatigue level. Hiking socks have a unique constricting band for better foot support. The price range is vast, and there’s no good rule for the socks. Again, I used Decathlon socks with some excellent results. And they are not too expensive comparing to some other famous brands. It is best to avoid cotton or wool socks as they provide zero support and can cause blisters as well.
Headwear
It depends on the weather and trip length. If the weather is cold, you definitely need something. There are no reasonable rules for hats, just get something warm. I prefer wool or something similar. If you are not sure about the weather or it changes quickly, or there is a chance of some strong wind, the best alternative would be Buff Headwear. You can use it as a scarf, as headwear or as a cover for your mouth if it’s chill. When used as headwear, it’s similar to the bandana.
Sunglasses
Some people take sunglasses, but I never do it. It’s just a waste of time to take them off every time I want to make a photo. Unless it’s some snowy terrain, which can hurt your eyes without the protection.
Backpack
This boils down to the length of the trip. If you are out just for a sunrise or sunset, you need a regular photography backpack full of your gear and maybe a snack. However, if you hike for days, you’ll need a hiking backpack. The volume depends on the length of the hike. For 2-3 days you’ll need 50-70L. For a single day, 30L will do. In case you take a hiking backpack, you’ll need to leave your photography backpack at home. Apparently, you can’t carry two bags! In this case, you may need to have a photo bag to move around the camp. I prefer Lowepro and Kata for their photography backpacks and bags. You can also try out a photographer vest for packing extra gear.
Gloves
Depending on the weather you may need some gloves to keep your hands warm. You can’t get away with some regular warm gloves because they will block all your fingers. And you need at least one finger to manipulate the shutter button and all the wheels on camera. That’s why photography gloves exist. They allow access to the thumb and index finger when required. Alternatively, for autumn/spring, I use some regular cotton long gloves, which stretch nearly up to the elbow and with access to all fingers.
Landscape Accessories – Gear
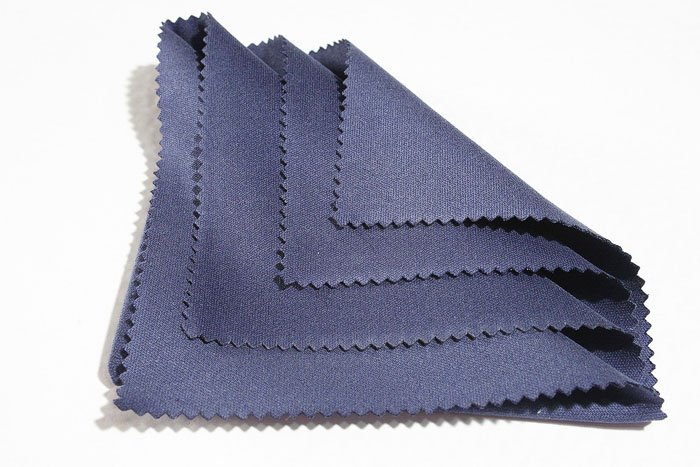
Microfiber Cloth
A piece of cloth saves your lenses from water drops or spray and also protects your photos from the elements. I always buy a bag of microfiber pieces from Aliexpress for a couple of bucks and then use them for a year. Keep a bunch in your camera bag as their weight is next to zero. I also have one or two in my pockets at all times during the photography session.
Tripod
Tripod selection is a big question. It really depends on the environment you are planning to shoot. For the mountain hike, you’ll want to pay more and get a carbon tripod as they weigh less. I prefer Manfrotto and Slik tripods. The tripod head is a matter of taste – some people prefer the 3D head, the others prefer a ball head. The only significant thing about the head is to get a pano head if you are really into panos. The more expensive tripod brand is Gitzo. It’s perfect but overpriced for me. The story is different if you shoot seascapes. The sea salt doesn’t care about the price you paid for the tripod and ruins the joints and the plastic quickly. Even if you rinse it every time, it’ll still be broken in half a year. The only way is to disassemble the whole structure every time it gets hit by a wave, which is overkill in my opinion. So I went another direction – I have found an excellent Chinese brand with reasonably priced aluminum tripods and get one of these every 6-12 months. The new functional tripod costs like $50. I always use the Weifeng brand. I’ve tried others too, but they weren’t any good. Get a tripod with clamps, not screws.
L-Plate
L-Plate is a single piece of equipment that can easily double the number of good photos you produce. How many times did you want to do a vertical shot and then left this idea behind because it was cumbersome and time-consuming to re-align the tripod? I bet it’s happened more than once. I had 90% horizontal shots in my portfolio just because it was inconvenient to shoot vertical or because the platform couldn’t hold the camera firmly. L-Plate solves these issues. It’s a special platform that attaches to your camera; it has both a vertical and horizontal part, allowing you to quickly change the alignment without touching the tripod head at all. The important note here is to look up the platform that’s designed for your camera. Not a generic one, not a multi-camera one, but the one that has your camera in the specification. I got one generic, and it was too loose, I had to throw it away. The other one I got from eBay that mentioned my camera fits like a charm. I don’t see a need to buy an expensive plate from a known brand. Chinese plates you can get from eBay or Aliexpress are just as good. Just read the description and find your camera in there.
Headlamp or Torch
Most landscape shots are created around the dawn or dusk. This timing means part of the adventure happens in the darkness. It doesn’t matter if you know the area, you still need a headlamp. It saves you from falling off the cliff, from tripping over the fallen branch, from stepping on the snake, and many other dangers. There is an advantage, however, to having a robust torch instead of the headlamp like the one I have – 8000lm SHADOWHAWK X800. It’s way stronger and helps with the following:
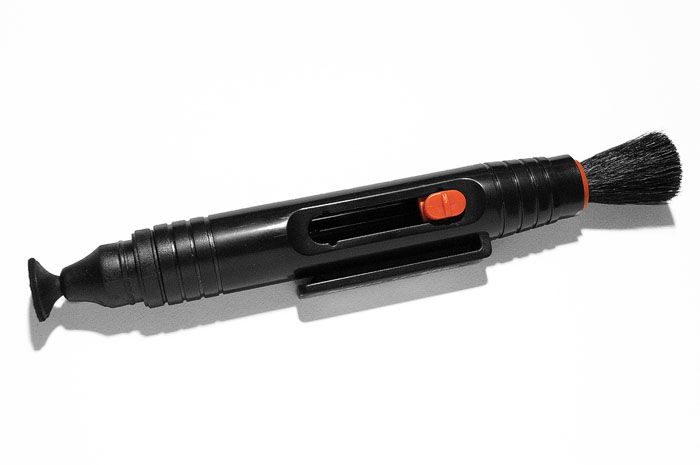
Lens Pen
The lens pen is a handy little device that helps to keep your lens clean. One of its sides is a brush, which helps to remove dust from any surface. The other side is something like a sponge, which eliminates tougher dust particles or fingerprints or whatever else you can get on the lens. You can’t really get rid of greasy things like fingerprints with the microfiber cloth, and that’s when a lens pen steps in to help you. Any brand will do the job for you.
Remote
The remote control is essential for regular long exposure shots and essential for ultra long exposures (longer than 30 seconds). The bulb mode requires you to have some sort of a remote to make use of it. There are a few types of remotes. One is a cable remote, which plugs in into the camera and then you press various buttons. They typically have a range of functions and buttons and allow you to change a lot of settings without even touching the camera. There is a whole range of prices and features from different brands to choose from. The other type is a single button remote that just fires the shutter button. I prefer the second one, easy to carry, no extra cables and costs a couple of dollars. Again, there is no need to pay extra for the genuine one, remotes from Aliexpress for $1 work just as well. The other new option is to connect to your camera using Wi-Fi if it has the built-in module. It allows controlling everything from your phone or tablet literally. My experience wasn’t as good because Wi-Fi on my Nikon D750 wasn’t overly stable for some reason and sometimes just wouldn’t work. Therefore, I keep using a single-button remote to avoid a lot of wasted time.
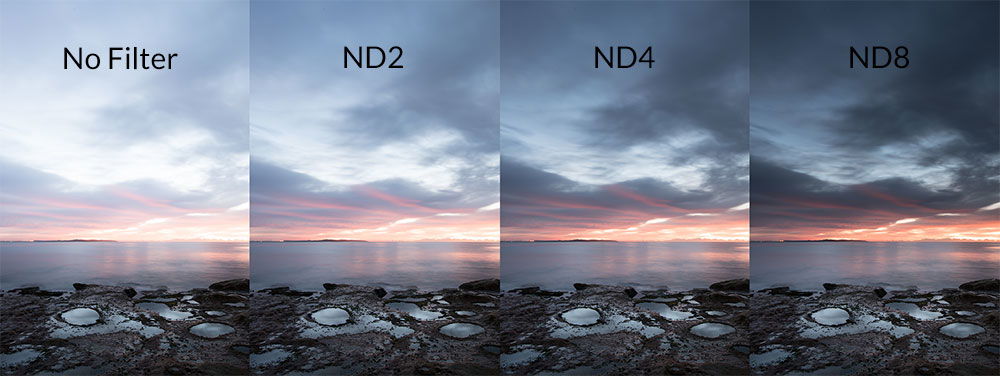
Filters
Filters are a significant piece of equipment for landscape photography. There are two types of filters – screw-in or square filters. The screw-in filters have an advantage of blocking extra flares by sitting tight. The square filters are better in everything else. First of all, they are more generic, and you don’t need five circular filters for five different lenses.
Filter Types
The primary filters to own are:
Conclusion
You have to be well prepared for your landscape photography trip even if it is for a sunrise picture. There are lots of little things to remember and you never know when you’ll need a particular item, so it’s best to think in advance and save yourself from trouble. Keep our list of photography accessories in mind for your next shooting trip. You’ll thank us when you come back with great photos and no blisters!