In this article, I’ll explain how to take photos with Camera+ and how to edit them.
1. The Camera+ Interface
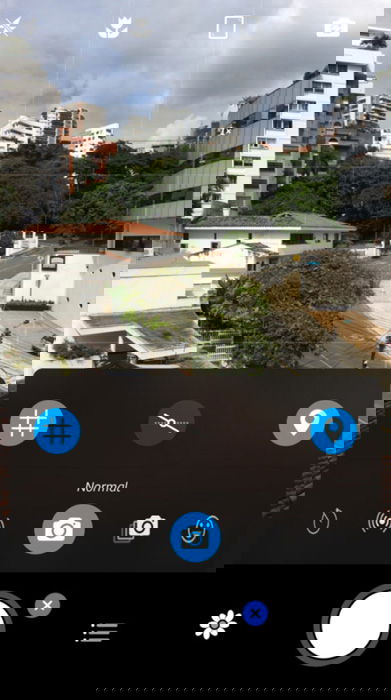
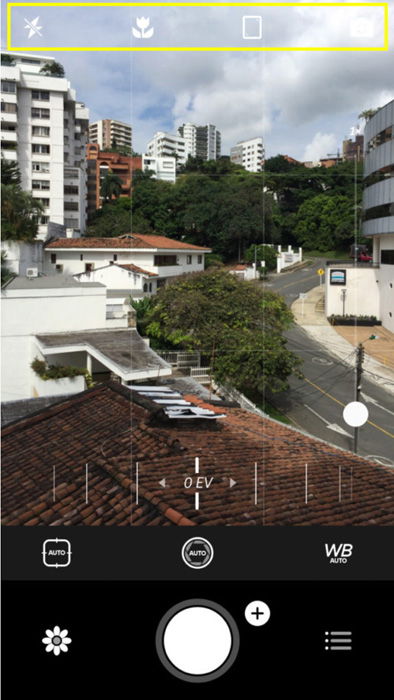
Camera+ looks nice and clean. You won’t have much trouble finding what you need but I’ll still go over it so you know what every icon means. At the top, there are icons for the essential camera controls. You can also zoom in and out, and with the round button you can take a photo, that’s the actual shutter release. Above the large white button are the icons for exposure compensation, shutter speed, ISO, focus control, and white balance. These controls aren’t visible by default. You need to open the app’s menu to make it visible. There is also a plus icon next to the shutter. Use this to see some other essential camera settings like shooting mode, geo-tagging, RAW, grid display, and level display. And you can use the flower icon at the bottom to start editing your photos.
2. How to Take Photos With Camera+
Now let’s start taking pictures with Camera+.
2.1 Basic Settings
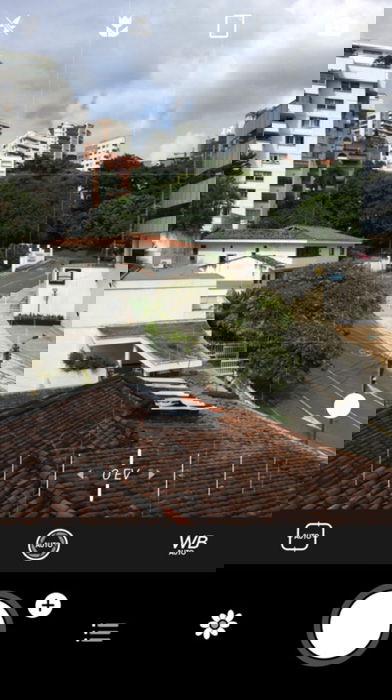
First, decide if you want to use flash. I don’t like how photos taken with a flash look, so I turn it off if possible, but it’s totally up to you. You can get creative by using flash too. Use the lightning bolt icon to open the settings. When the lightning bolt is on, the app will use the flash all the time. The next icon turns the flash off for every shot. If you don’t want to decide for yourself, use the auto-icon and let the app do all the work. It will determine if there’s enough light or not, and it will use the flash accordingly. Then, there’s the flashlight. It turns on your iPhone’s flashlight, lighting your subject continuously. Cameras also use a continuous light to help to focus, for example. If you want to take photos of small objects close by, turn on macro mode. Use the flower icon to turn on this mode. Camera+ will magnify the subject; however, it does this digitally. So, don’t expect great results. The second to last icon sets the aspect ratio. Scroll through portrait, square, or landscape orientation and see which aspect ration you like. Think about it before you shoot, though. Some options, like Square or Horizontal, are cut out. If you use these, your photos will be taken in a lower resolution. It’s better to hold your phone horizontally for landscape orientation and edit later. Finally, you can zoom in and out if you want. Remember that zooming will also lower the quality of your images
2.2 Advanced Settings
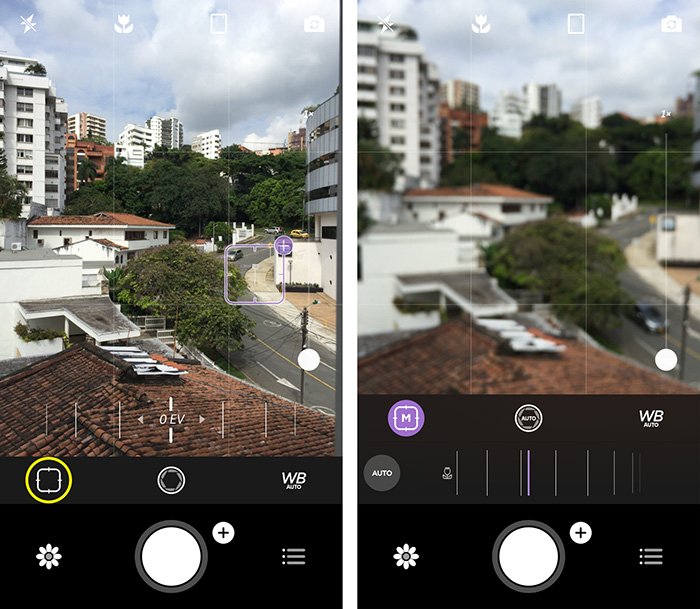
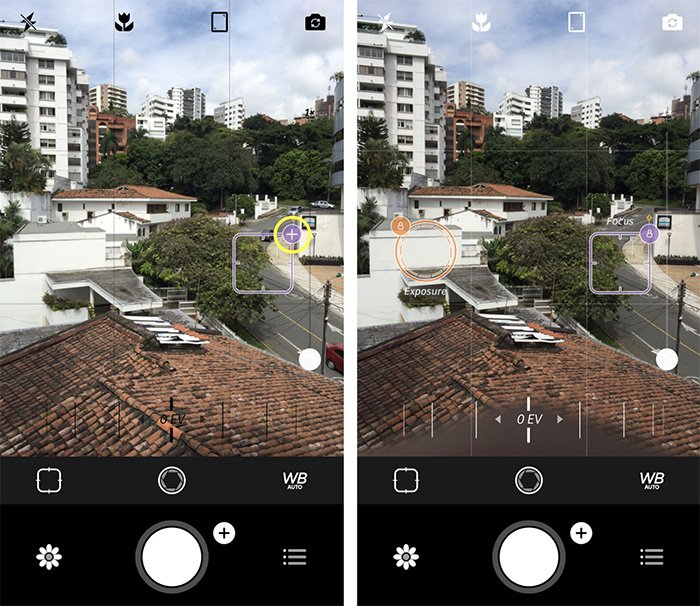
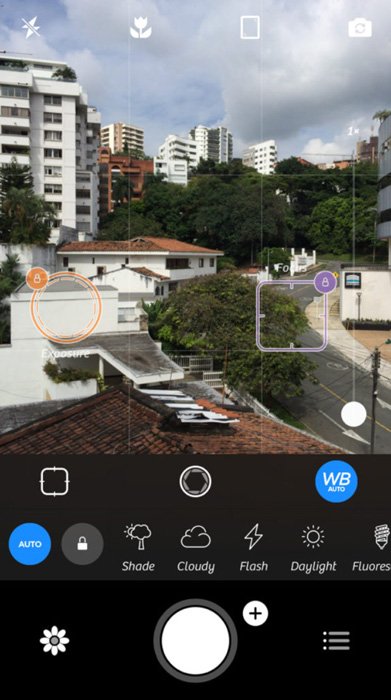
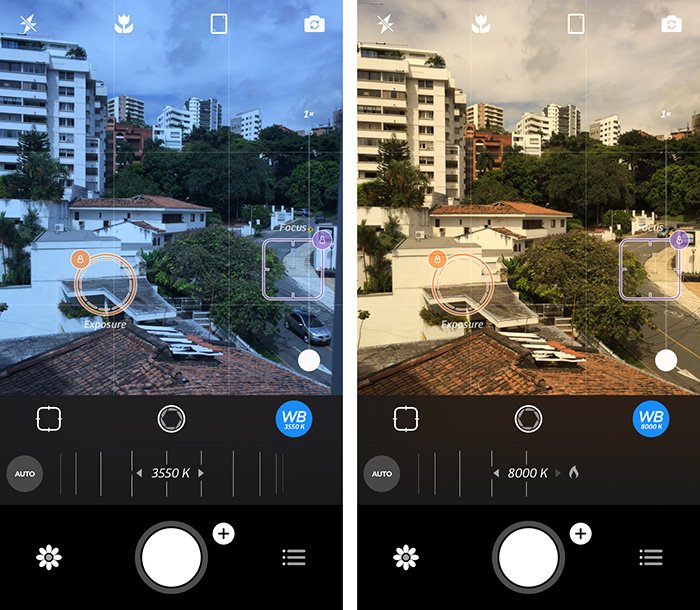
Like almost any camera, you can focus manually or automatically. Touch the screen where you want to photo to be sharp. If you still don’t like how the Camera+ app focuses or if you want more control, use the focus icon above the flower icon. Drag the slider under the viewfinder to make adjustments to the focus. This action is similar to turning the focus ring on a lens. This feature is especially useful in macro situations. Return to autofocus with the AUTO button. Camera+ also changes the exposure when you set the focus but you can make the image brighter or darker manually too. Tap the plus symbol on the focal point marker. An orange Exposure circle appears. Drag this circle anywhere you like. The Camera+ app will set the exposure depending on the position of the ring. Once you like how it looks, lock the exposure with the small padlock icon. Finally, set the white balance. White balance decides how warm or cold your photos will appear. Sunset or sunrise photos will generally look warmer than pictures taken at noon or on an overcast day. You can use the WB icon to select a WB setting. Scroll through the settings until you find one you like. You can also go all the way of the list and hit the plus-button. A Kelvin slider appears. Drag the slider left or right to change the color temperature meaning warmer or colder.
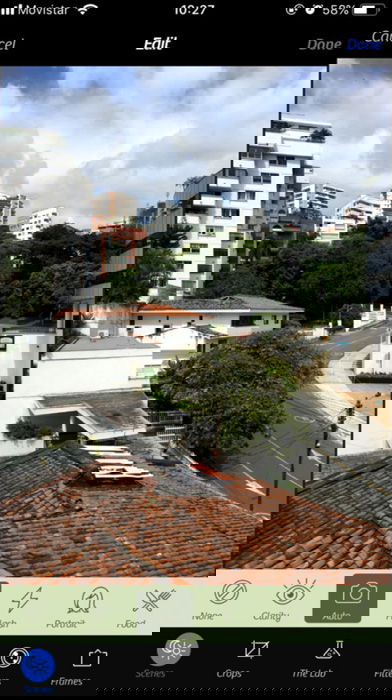
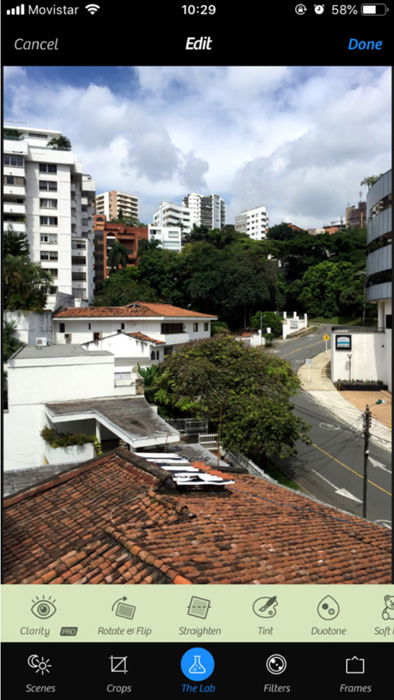
3. How to Edit Your Photos With the Camera+ App on Your iPhone
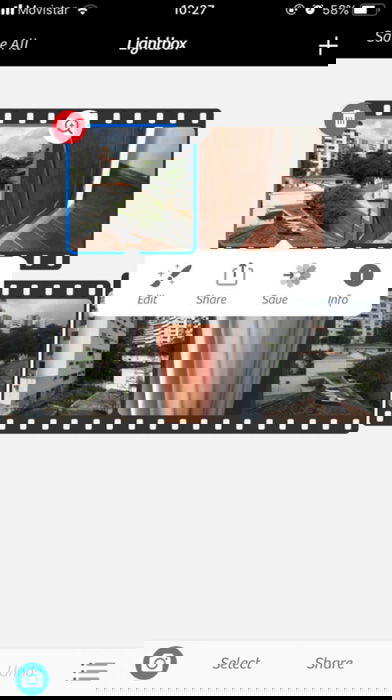
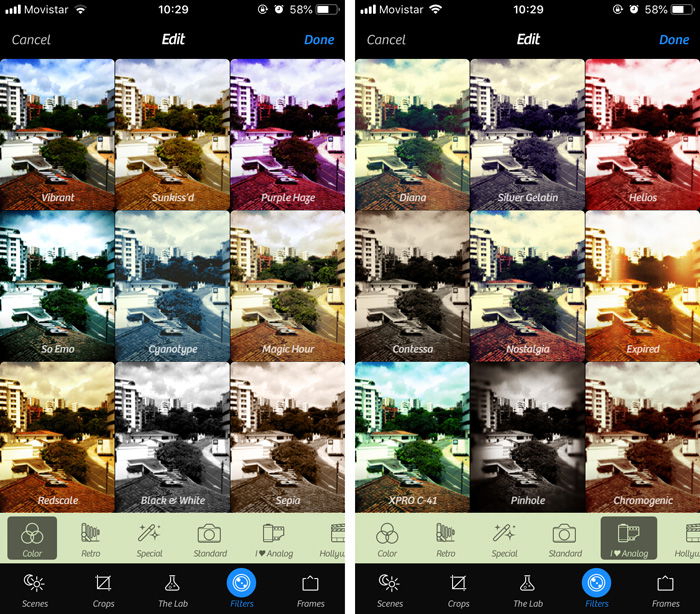
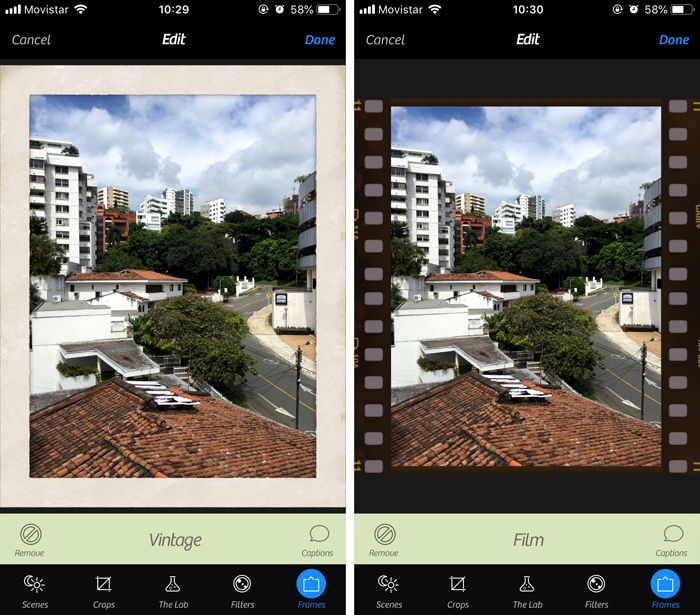
Camera+ comes with a range of editing tools to fine-tune your images. Here’s how to start editing in Camera+. Hit the flower icon. All Camera+ photos will appear. Select an image you want to adjust, then hit “Edit”. There are five editing tabs. Tap the Scenes icon if you want to use the presets that come with Camera+. Scroll through the possible effects and select a preset to apply one to your image. Next, use the Crop tool to cut your image. Select one of the preset aspect ratios or use Freeform and set the aspect ratio yourself. Now, drag across the screen to set the crop. Hit Done if you like the settings. You can also use the Lab to edit manually. Tools to help you include Tint, Sharpen, Highlights & Shadows, Vignette, and Clarity. You can experiment but it’s best to learn more about these options first. All of these tools are also available in professional editing software. The possibilities are limitless. I’d suggest reading about the basics of photo editing first before you dive into these tools. Finally, you can add Filters and Frames. Filters are effects you can apply in one click. Some of those filters require an in-app purchase before you can use them. Choose a filter to add it to an image. Use Advanced to set the strength of the filter. Frames allows you to create a border around your photo. Additionally, you can add captions. Scroll through the frame categories to find one you like. To apply one, select the frame preview to see it.
Conclusion
Camera+ is one of the best iPhone apps to take photos. It combines a camera app and an advanced editing app in one. All you need to do is to install it on your iPhone and start taking photos. It’s easy to use, and in no time, you’ll make awesome smartphone photos. You don’t need to buy an expensive DSLR or mirrorless camera anymore to take great pictures.

![]()