I can even rotate selected parts of my photograph. In this article, I’ll show you a few ways to rotate an image in Photoshop.
How to Rotate an Image in Photoshop Using Different Options
Image Rotation Option
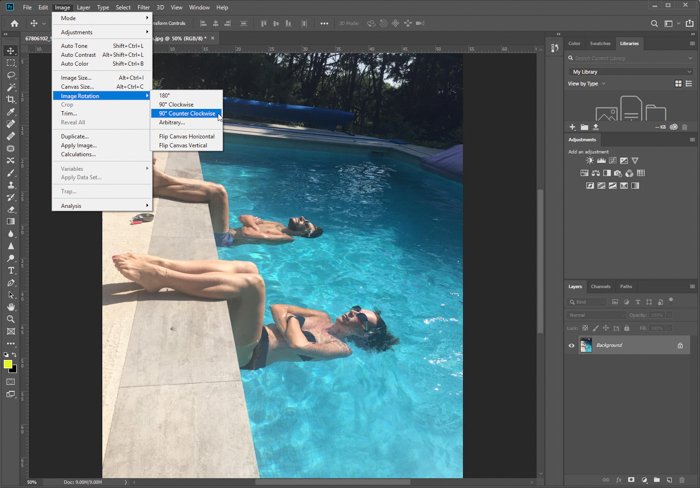
Rotating a photograph is a useful feature of Adobe Photoshop. Thankfully, it is a very simple action. This picture was taken with the idea of rotating the image to use perspective creatively.
First, click on the ‘Image’ dropdown menu in the menu bar. Then, go to Image Rotation>90° Counter Clockwise. This will rotate the photo left. If you want to rotate the photo to the right, select Image Rotation>90° Clockwise. You also have the option to rotate the image 180°. Photoshop will flip the picture upside-down.
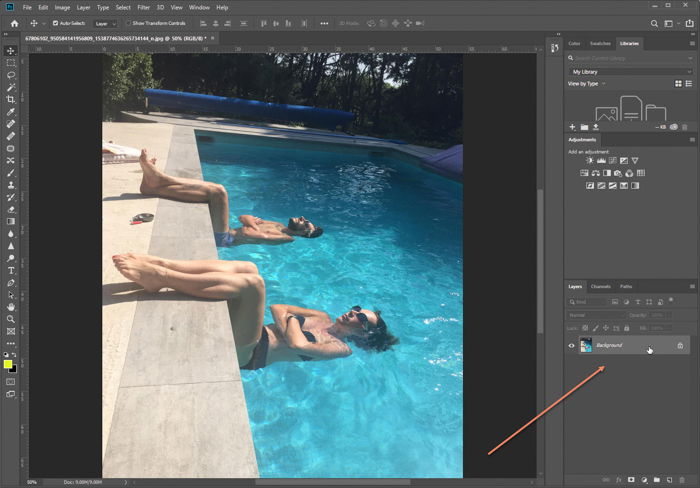
This is the final image after rotating it left or counter-clockwise.
Transform Option
The other option is to use the Transform tool. For this to work, first you need to select the layer. Go to the Layers panel in the bottom right corner and click on the layer. If it is locked, click on the lock icon on the right. This will unlock the layer.
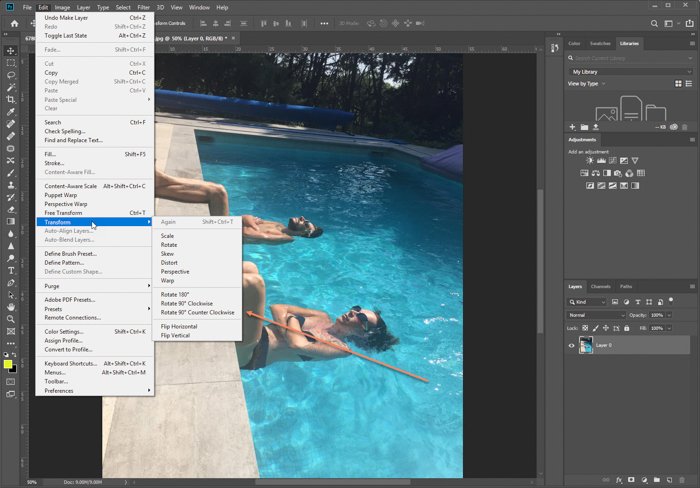
Next, go to the Edit dropdown menu in the top toolbar. Find Transform>Rotate 90° Counter Clockwise. Photoshop will rotate the photo to the left.
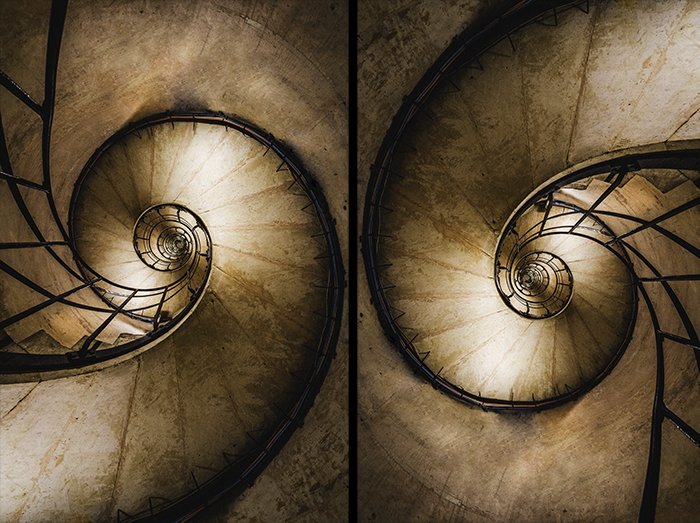
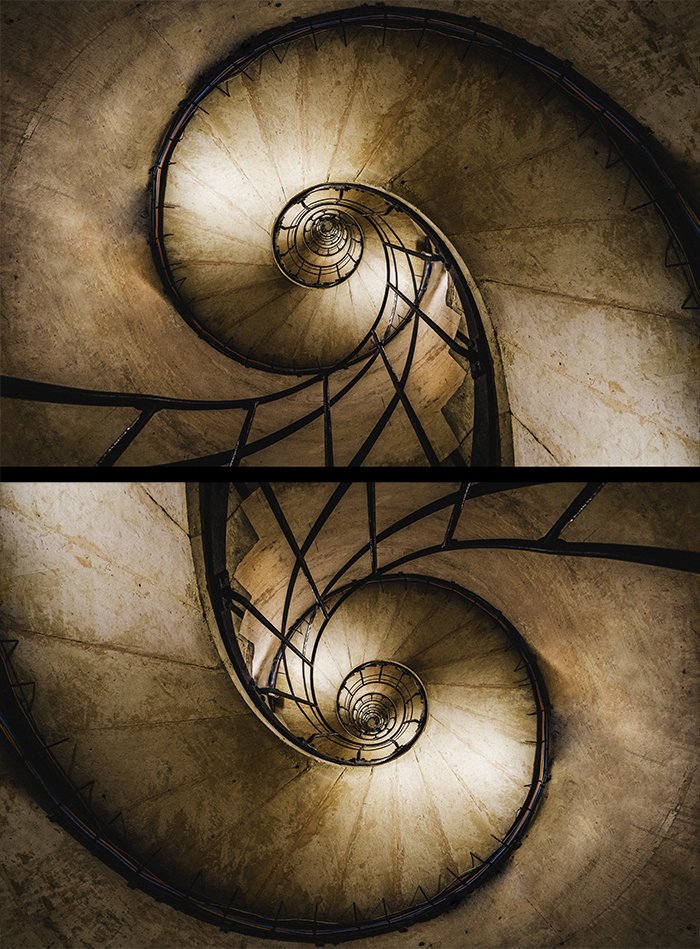
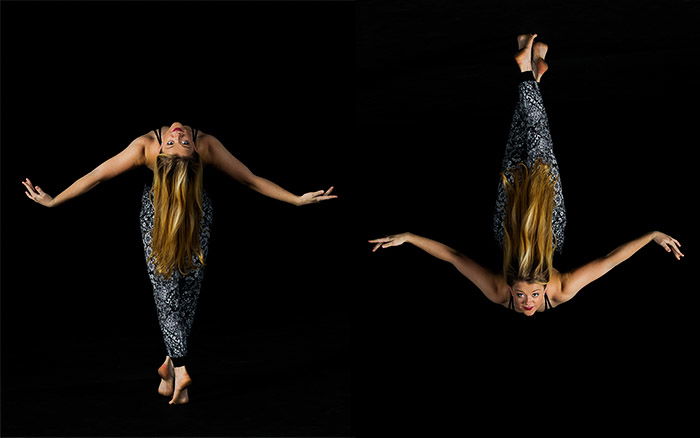
Some images take on a completely different look when they are rotated. I rotated this image through 90° to see which version I liked the best. I end up liking the version with the railings coming in from the bottom left corner. Sometimes rotating a photo can literally turn the world on its head. Rotating this dancer 180° and she now appears to be falling or flying through the air. I rotate photos to create a visual effect or to play with perspective. Rotation options in Photoshop are also useful in straightening a tilted image.
How Do You Tilt an Image in Photoshop?
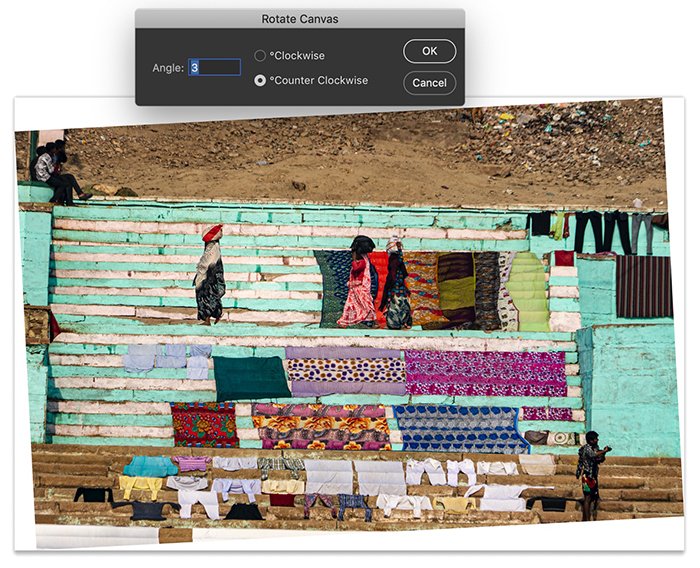
Here is a very badly tilted photograph that I took in India. In all fairness, I was on a moving boat and had difficulty stabilizing my camera. The tilt is even more pronounced because of the graphic lines on the painted stairs.
I have a few options for straightening this photo:
Arbitrary Image Rotation Free Transform Crop Tool Straightening
Arbitrary Image Rotation
Arbitrary image rotation isn’t really arbitrary at all. This selection allows me to fine-tune the amount of rotation I want. Under the Image dropdown menu, select Image Rotation>Arbitrary. The Arbitrary option lets me select the number of degrees to rotate my photo.
If I don’t like the amount of rotation, I can always undo the change (Edit>Undo or press Ctrl or ⌘+Z). By using this simple tool, you can rotate your image by any number of degrees. I use the Crop tool to remove the extra white space created around the image.
Free Transform Rotation
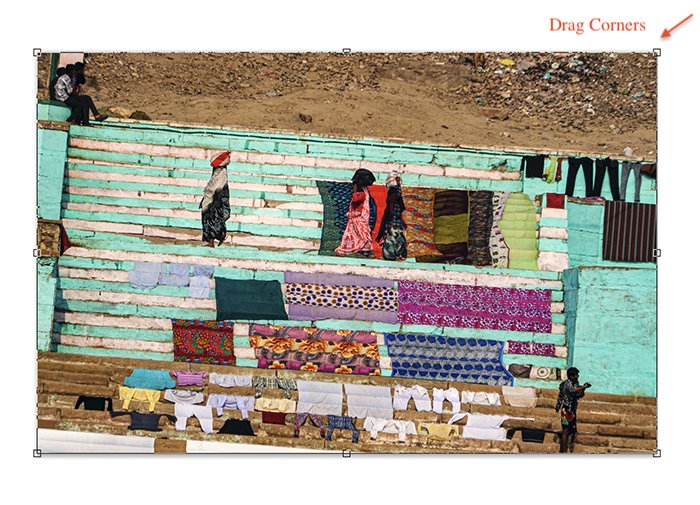
The Free Transform tool is another option to control the amount of rotation. Under the Edit dropdown menu, select the Free Transform option (Ctrl or ⌘T). A bounding box will appear around the image. When I hover my cursor near the corner, I get an arrow tool. I can drag the image clockwise or counter-clockwise. The more I drag, the greater the rotation.
The same option is available under the Transform tool. The Crop tool will also allow you to drag the corners of your image to rotate. Instead of dragging, I can type in the number of degrees in the Free Transform toolbar. When I’m happy with the rotation, I press Enter or click the tick on the top toolbar. And I’m good to go.
Straightening Option in Crop Tool
Since Photoshop CS6, there is an easy, built-in option for straightening a horizon. Select your Crop tool (or press C). In the Crop toolbar. Click on the small level icon in the toolbar that says ‘Straighten’. Draw a line across your image along the horizon line. Photoshop will then rotate your entire image to make this line straight. Photoshop will also automatically crop your image to remove any white space in the corners.
Rotating Layers
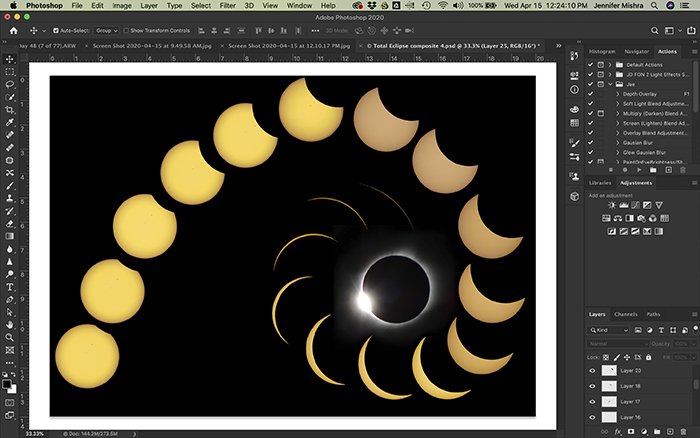
The rotation options under the Image dropdown menu affect all layers. The rotation options under the Edit dropdown menu affect only selected layers. This includes both the Transform and Free Transform tools. If you want to rotate a part of your image, use the Quick Selection tool to highlight this element. Choose the Layer dropdown menu then New>Layer via Copy (Ctrl or ⌘J). Select only the layer(s) you want to rotate and use the Free Transform tool. For this image, I layered 20 images of the total solar eclipse of 2017. I rotated each layer with the Free Transform tool a few degrees to create this spiral pattern.
Conclusion: Street Photography Quotes
Whether adjusting a technical element or making a creative change, Photoshop gives you many options for rotating an image. The rotation tools under the Image dropdown menu affect the entire image. The rotation tools under the Edit dropdown menu affect only selected layers. You can choose to quickly rotate an image by 90° or 180° or fine-tune the rotation. The Crop Tool includes a straightening option to help you quickly straighten those tilted horizons. For more editing know-how, take a look at our Effortless Editing in Lightroom course!