Getting Started with Wedding Photography Workflow
photography workflow goals and limitations. My wedding photography business is not your wedding photography business. Just like two photographers would get two different sets of images even when photographing the same couple at the same venue, wedding photography workflows aren’t a one-size-fits-all deal. I’m sharing what works for me — but it’s important to know that your wedding photography workflow may look different and that’s fine. Before you start defining your wedding photography workflow, start with your own work in mind, your own schedule and your own lifestyle. Ask yourself a few questions:
What’s the goal for my wedding photography business? What other commitments do I have and how will that affect my timeline? How many weddings do I book, and what’s the ideal number of weddings to book every year? What area am I serving, and what are the weddings like here? What is my typical client like? What’s my business budget?
You may not have all the answers yet, especially if you are just starting. The essential first step is to take a look at your style, your business, and your schedule in order to develop a workflow that works for you. For example, wedding photography isn’t my full-time job — I’m also a tech writer writing about photography. That means I don’t promise my clients they’ll have a fully edited gallery a week after their wedding. Subsisting on no sleep and gallons of caffeine isn’t good for my health or the quality of my work. Because weddings are only a portion of my work, that also means I book fewer weddings and I have a smaller budget. Starting with a general idea of your work, your goals and your schedule will help you build a wedding photography workflow that fits your work. And don’t worry — you don’t have to chisel your workflow into stone. You can adjust as your business grows or your lifestyle changes.
Booking a New Bride and Groom
My wedding photography workflow starts as soon as a potential bride and groom contact me. I keep booking as simple as I can. Planning a wedding is stressful enough, so I work to be straight-forward with my bride and groom. While simple is good, booking a new wedding still should include several elements.
Check the Availability of the Wedding Date.
If the date is available, I will write the bride and groom in my calendar with a question mark. This allows me to keep track of what dates have already been inquired about. Once the bride and groom says the contract is on the way, I remove the question mark.
Answer Any Initial Questions. Then Send Over a Wedding Guide
Couples will always ask questions. And I love when couples ask questions because that starts an important, memorable conversation. Once I’ve answered any initial questions, then I send over a wedding guide. This is a packet that helps answer all the frequently asked questions. My wedding guide includes:
A price sheet A “what to expect” page Tips on scheduling enough time for photos on the wedding day A wedding info sheet to fill out with all the details of the day A vendor list that allows me to tag other businesses when I share images on social media later. The wedding contract
A Meeting With the Bride and Groom
Some couples ask to meet me in person before booking, other couples I meet with sometime between booking and before the actual wedding. Occasionally, I will meet the bride and groom for the first time on their wedding day and run this meeting by phone or email. This generally only happens when the engagement is short or the location is outside my usual area. During this initial meeting, I answer any questions the couple may have. I’ll also run through what a typical wedding day looks like for me, and give them tips on how to schedule enough time for photos. I always recommend at least an hour, excluding any travel time and the time necessary for any receiving lines and other traditions. And for larger families, I always recommend more time. I also let the bride and groom know that the more time they schedule for formals, the more poses they will have to choose from. At the same time, I try to learn a bit about the bride and groom and their wedding. I ask about how they met. I ask about their wedding colors and style and about their bridal party. The photographer is the vendor the bride and groom spends the most time with during the actual wedding day. The initial meeting can help the couple feel more comfortable around me.
Signing the Wedding Contract
The wedding contract is the only paperwork I require up front. While I have a sheet with times, addresses, clergy contact information and other details, many brides and grooms don’t have all the details ironed out this far in advance. The contract details my responsibilities and fees along with what I deliver. My contract also states what the couple can do with their images (i.e. they can share them on social media with credit, but not sell them on a stock photography website). The contract also details what happens if the couple cancels or changes their date. And what would happen if a medical emergency or Act of God prevented me from shooting the wedding. It hasn’t happened yet, but this is an essential detail to include in the contract. With the wedding contract, I also require a small percentage of the wedding photography fee up front. This non-refundable fee covers the time I’ve spent on the early part of the wedding photography workflow if the couple, for some reason, has to cancel. It also guarantees I’m not going to book anything else on the same date. Once I have the contract and deposit, that question mark comes off my wedding calendar and I’m booked for that full day.
Do You Need Client Management Software?
Software can simplify the booking process, keeping your calendar, leads and other information all in one place and allowing clients to book online. For large studios, the cost of the software is likely well worth the time saved with a simpler booking system. As a small studio, I’m able to manage the number of weddings I shoot without. Software is, however, a part of my growth plan when I need to simplify bookings even more. Some of the most popular client management software options for wedding photographers are Tave and ShootQ.
The Engagement Photos
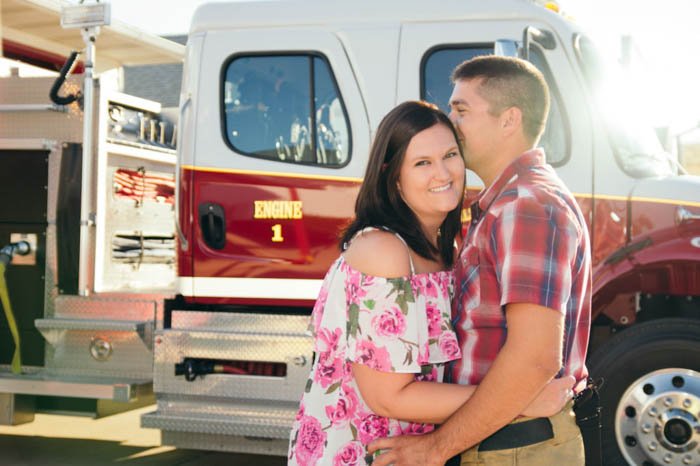
Engagement photos allow the photographer and the couple to get to know each other ahead of time. This is why I include engagement photos in my workflow and in most of my wedding packages. Photographing the couple ahead of time helps me learn their style, the way they interact with each other and the poses that work best for them. So what does the engagement portion of the workflow include?
Schedule the session and choose a location. If the couple has a place that’s special to them, we’ll head there for the photos. I also offer suggestions for locations that I know are great for photographs. I schedule a majority of my engagement sessions during golden hour. Shoot. During the engagement session, I go through some traditional poses. Then I move into more candid shots like asking the couple to dance together or take a walk. Don’t forget a shot of the ring too. After the session, I let the couple know when to expect the images. I also let them know it’s okay for them to speak up and let me know if there’s a pose they don’t like, so we can skip that one on the wedding day. Once the couple leaves, I may also jot down a few things that I want to remember on the wedding day. Sometimes engagements are a full year before the actual wedding. Cull photos and edit. I choose the best images by flagging my favourites in Lightroom. I edit my favourite shot first and share on social media to give the couple a sneak peek. Then I go through all the images and make any adjustments in Lightroom. I go back through a second time for local adjustments, such as removing tan lines or editing out acne. I’ll share images on social media as I get groups edited. Upload and share. For engagement photos, I deliver using an online ordering platform. (I use Pixieset). I send the bride-to-be the link, then I also share the final gallery on social media. Engagement galleries are also uploaded to my online portfolio. I include only the best shots here, where the ordering gallery may have some I decided not to leave in my portfolio.
Pre-Wedding Photography Workflow
The wedding is booked, the engagements are done — but there’s still a few things I tackle as the wedding gets closer. About two to four weeks before the wedding, a wedding photography workflow may include several steps.
Get the Final Paperwork From the Bride and Groom
Before the wedding, I make sure I have the wedding detail sheet. This means I have the exact addresses of the venues along with details like the number of people in the bridal party and how to contact the clergy. If I am shooting a ceremony where I am unfamiliar with the religion, I talk to the officiant ahead of time to make sure I am respectful to those traditions during the ceremony. I also get the schedule of the day and the list of vendors. No one wants to be interrupted on their honeymoon because the photographer can’t remember who made the cake.
Have the Last Pre-Wedding Chat With the Bride and Groom
Sometimes, I just talked with the couple a few weeks ago during booking. Most of the time, months and even a year can go by between those early conversations. I like to chat on the phone (or by email if necessary) one last time before the wedding. This is when I ask the bride to bring along an invitation to include in the detail shots and remind the couple of any remaining payments due. I’ll also confirm the time I need to arrive. During this chat, I’ll also ask the questions that are rather awkward to ask on the wedding day. I will ask if they included me in the count for the caterer, or if I need to bring my own meal. Don’t shoot for 12 hours without eating something. I’ll also ask details on the family. I want to know if the bride’s parents are divorced and will be in separate family photos. And I certainly don’t want to ask for the grandparents only to find the groom’s grandparents recently passed away. Get the awkward stuff out of the way and focus on the positive conversation during the wedding day.
Get the Gear Ready
The day before the wedding, I make sure that all of my batteries are charged for the camera, the flash, the wireless flash receivers and transceivers. I will make sure that I have several memory cards in my bag and that all those cards are already empty. I’ll also do a quick lens check and make sure the lenses are clean. I also check my back-up camera and make sure that battery is fully charged.
Get Some Rest
Weddings are long days. It’s hard to be creative when you’re tired. I make it a priority to get some rest the night before.
The Wedding Day
The day of the wedding focuses on, well, shooting the actual wedding. But there are a few workflow items that fall on the big day too.
Double check the contents of the camera bag. Arrive early enough to explore the venue to note locations for photos, if you haven’t already. Photograph the wedding, from getting ready to the reception. I photograph candids throughout the day and formals and details in between. (Here’s a checklist of the typical photos included in the wedding day). Once everything is wrapped up, congratulate the bride and groom. At home, download photos. Make sure photos are saved in at least two different locations for safekeeping. Share a sneak peek using a favourite image of the couple, usually the night of or the day after the wedding.
Post-Processing Wedding Photography Workflow
The wedding is done. The work is not. Here’s what’s up next.
Cull the photos, choosing the best shots. Look for the best ones to deliver to the newlyweds. But look at the bad shots too in order to learn from your mistakes. Edit the shots. I find it faster to apply presets and make exposure and color adjustments first. Then I’ll go back for local adjustments. Share the images in small batches on social media. I know many photographers wait until all they’ve finished editing, but I like to share a few as I work on the edits. My brides and grooms say the sneak peeks build anticipation for the final album, not to mention seeing more reach. I use that vendor list here to give credit where credit is due — and tagging another vendor can also boost your views. Since social media and word of mouth is the way most new couples find my company, I usually sponsor a few posts on Facebook, targeting recently engaged couples in my target area. Once the images are finished, put together the final deliverables as detailed in the contract. For me, that’s delivering a custom USB drive with digital files and an online ordering gallery for prints. For the USB, I’ll either schedule a meet to pick-up or deliver via mail in sturdy packaging, depending on how local the newlyweds are. With prints ordered online, I don’t have to add ordering and delivery to my list — the prints are delivered directly from the printer. Add the wedding images to the portfolio.
Wrapping It All Up
The wedding photography process begins well before the wedding day and continues well after. Finding a workflow that works with your photography — and your lifestyle — helps ensure each client is cared for and the business moves forward smoothly. While wedding workflows differ from photographer to photographer, most will contain a majority of similar items to end with an excellent album, a happy couple, and a referral for another upcoming wedding. SLR Lounge have recently released their Complete Wedding Photography Training System. We advise you to check it out for a full wedding photography education. For some more great wedding photography ideas why not check out our post on making a wedding photo booth or tips on wedding photo lighting.
