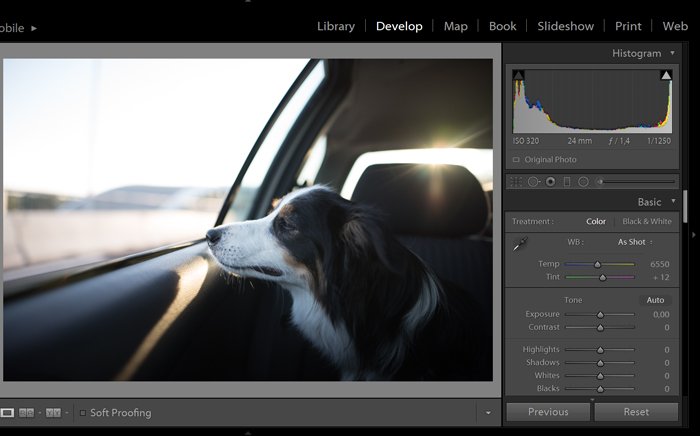
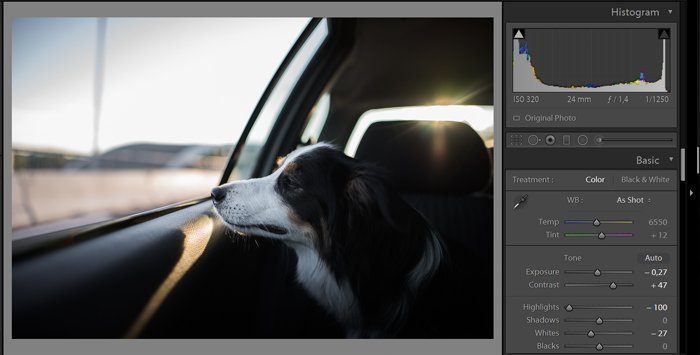
Before you think you wasted your time, it’s worth considering what you can do with these photos. At some point or another, you are going to need to know how to fix an overexposed photo. Read on to learn how to deal with incorrect exposure. [ExpertPhotography is supported by readers. Product links on ExpertPhotography are referral links. If you use one of these and buy something, we make a little bit of money. Need more info? See how it all works here.]
Understanding How to Fix Overexposed Photos
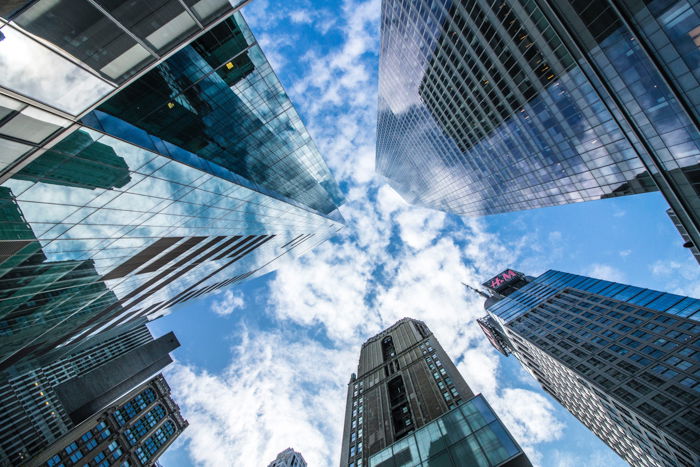
An overexposed photo can be caused by several different things. Either you aren’t metering the light correctly, or your camera isn’t. We are so used to our eyes compensating for light and dark areas, we forget cameras can’t do the same. Consider this. When you look at a building on a bright, sunny day, the facade hides in the shade. The ground, along with the sky, is well-lit. To our eyes, there isn’t much difference in the light. We can pick out the details in the shaded areas, as well as the well-lit ones. Our camera, however, can’t do the hard work because they lack a brain. To your camera, the shaded areas could be over three stops darker than the well-lit ones. Overexposing an image can also be because we got used to looking at screens all the time. Sometimes, it is even hard to notice overexposure on your camera’s screen. Imagine this scene—you’re trying to photograph a tall building on a sunny day with a few clouds. Either the sky is perfect and the building is too dark, or the building looks perfect and the sky becomes blown out. Knowing why your images turn out overexposed is half the battle.
How to Read The Histogram
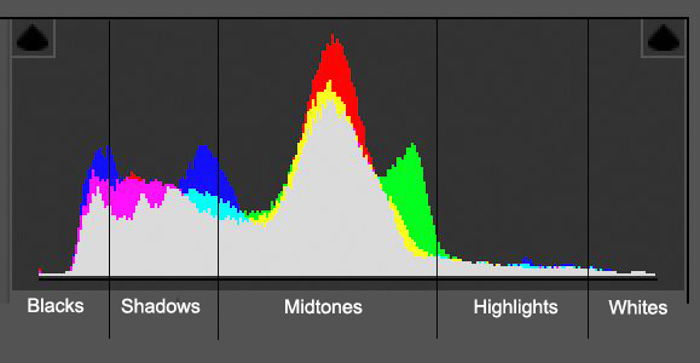
Even though your camera doesn’t have a brain, it can still let you know that your photos are overexposed. The main tool for this is the histogram, and they can help you in a pinch. A histogram is a graph that shows you the tonal range of your exposed scene. It separates into three equal parts—dark tones, midtones, and light tones. The dark tones are further split into blacks and shadows. Light tones are split into highlights and whites. Being able to read a histogram will help you know when your image becomes overexposed. By looking into which areas your colored pixels fall into, you can see what types of light are in your image. The histogram is best when the shape of the diagram looks even. It should not be shifted or distorted left or right.
A majority of pixels towards the left shows dark areas in your image. The more pixels, the bigger the area. As they fall more and more to the left, the areas are darker and darker. This works in the reverse as more and more pixels appear in the right areas. This means larger and stronger areas of white. A contrasted image will have pixels that fall in all three areas, peaking in the mid-tones. This is, depending on the scene, a well-balanced image.
Why You Should Shoot in RAW
Shooting in RAW is the only way we recommend taking photographs at all. A RAW file may be 2-6 times bigger than a JPEG, and there is a good reason for that. RAW images have JPEG embedded in them, but a RAW image holds more information about the scene than a JPEG does. This is due to the fact that RAW is not a compressed format, but a lossless one. This allows you more control when it comes to editing your images. It works especially well for bringing detail back into the overexposed areas.
RAW files come as many different file types. Canon uses CR2/CR3 file types, NEF is for Nikon, and Sony uses ARW. You will need Camera Raw to process them. As long as you use Adobe Lightroom or Photoshop, they will pose no complications. There are other programs as well that allow you to process RAW files. One of these is Capture One.
Why Are My Photographs Overexposed?
What Is The Exposure Triangle?
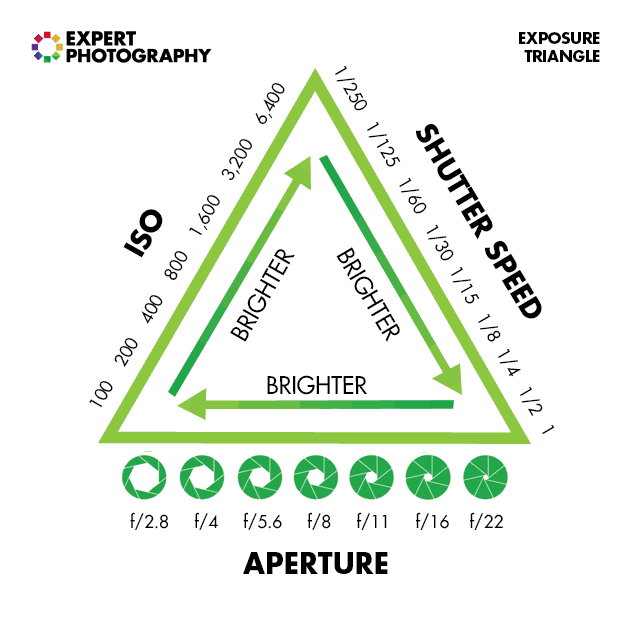
The exposure triangle is made up of how the ISO, shutter speed, and aperture work together. If you are shooting in manual mode, it is easy to create an overexposed image. For example, in terms of ISO, you may have just set it too high. For a sunny day, your ISO should land around 100-200, not 800. After setting your ISO, the next area you should be looking at is the aperture. The lower the f-stop, the more light will enter your lens. And the more light that hits your sensor, the higher the chance of overexposing your image. Try closing down the aperture for a better-exposed image. After setting your ISO and aperture, turn your attention to the shutter speed. If your image is too bright, you need to increase your shutter speed. Raising it from 1/200 s to 1/600 s will help—as long as it doesn’t affect other settings. The best thing about the exposure triangle is that all three settings are codependent. If you increase the amount of light entering your lens with one setting, you need to adjust another setting. That’s why it’s very important to understand the exposure triangle.
How to Choose a Metering Mode
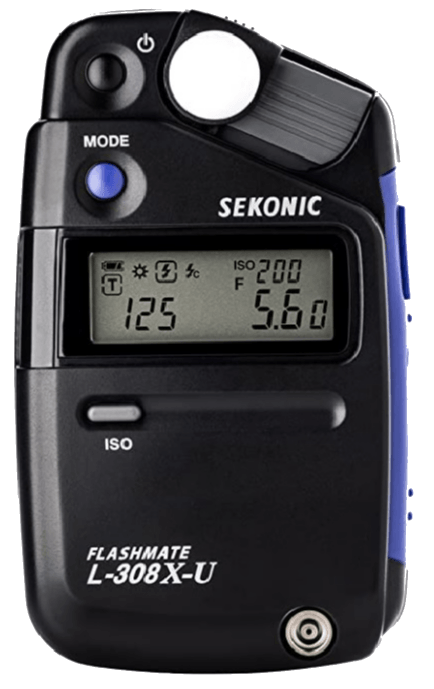
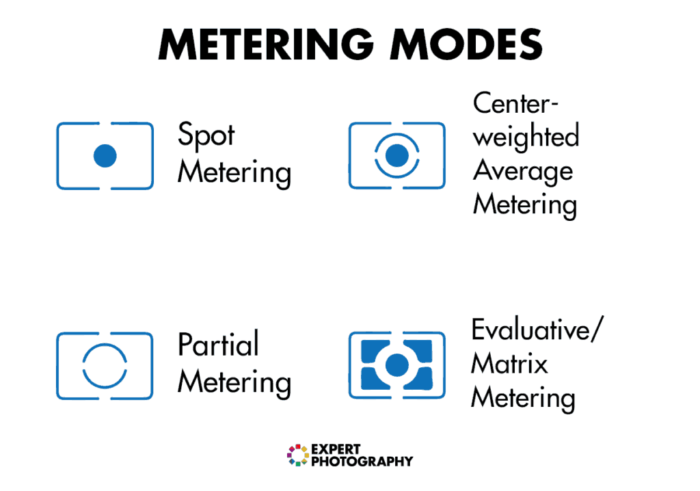
Your camera has a built-in light meter. This is handy for knowing when a scene needs a change of settings. There are three metering modes—matrix, center-weighted, and spot metering. They all look at your scene in different ways. The matrix (or evaluative metering mode), looks at the whole scene to work out the best exposure. A center-weighted metering mode looks at the center of the image and works out the best exposure from there. This is perfect when you need to correctly expose one area of your image, not considering the background. Spot metering correctly exposes for one point (spot) in your scene. It doesn’t take in the other 99% of the image.
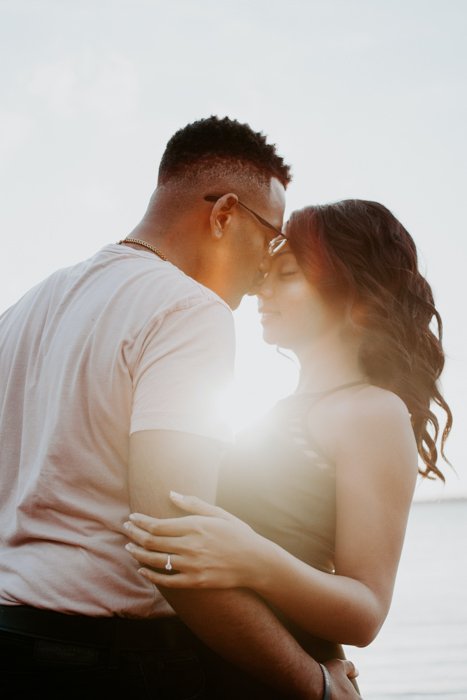
The light meter is a curse and a blessing. The metering modes will help you find a correct exposure, but they can really mess it up if you aren’t careful. For example, if you photograph a portrait in the center of the image, it might overexpose the rest of the image. When you want to capture a shot of the sky, your metering modes will find that correct exposure. However, clouds coming along means your camera needs to re-evaluate the scene.
How Can I Fix Overexposed Photos?
Learn How to Take Well-Exposed Images
I know this sounds obvious, but it’s the best way. Understanding how you take a correctly exposed image will help to eliminate the problem. In other cases, post-production will help. If you are shooting in manual mode, make sure you meter the scene accordingly. If your scene is too light, then either the aperture or shutter speed needs to go up. Or the ISO needs to come down. In terms of editing and correcting exposure, it is always better to underexpose your images manually. You can bring it back to an even exposure afterward. And it is easier to do so than in the case of overexposure. With overexposure, you always end up losing detail in your shots. With underexposure, however, you barely do. As you become more and more proficient with your photography, you will see where the problems lie.
Use Bracketing
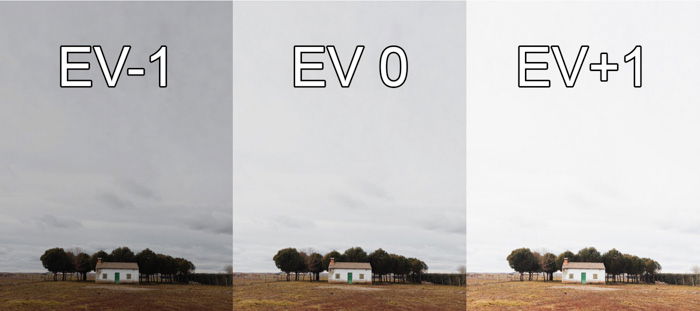
One way photographers get over the possibility of an overexposed photo is by using bracketing. This is when you take two extra photographs of your scene, but with a +1 and -1 exposure value than what you find to be the best. This idea gives you three chances to nail the shot. This was a favorite technique of film photographers, as they were unsure if they have the correct exposure. All you need to do is first set your camera mode to manual. Take a shot at what you think is best, then raise and lower one of the three exposure triangle settings. This will give you those -1 and +1 exposures. For example, if I had a scene where the settings were ISO 100, a shutter speed of 1/1000 s, and an aperture of f/5.6, I would capture that first. Then, I would change the shutter speed to 1/500 s for the +1 value, and then 1/2000 s for the -1. Remember, if you change your shutter speed, you are changing how you photograph scenes with movement in it. You are free to move the aperture, but that may affect your depth of field. Do what is right for your scene. Now, if instead of going for -1 and +1, you went for -3 and +3, then you have the possibility of stacking your images together. This is called high dynamic range (HDR). The benefit of this technique is that, by stacking these images together, you bring out detail in the lighter areas. You also bring up the exposure in the darker ones. For example, by photographing the interior of an apartment, you’ll find a correctly exposed interior and overexposed windows. By taking three images, you equalise the light, making it more balanced.
Add a Graduated Filter
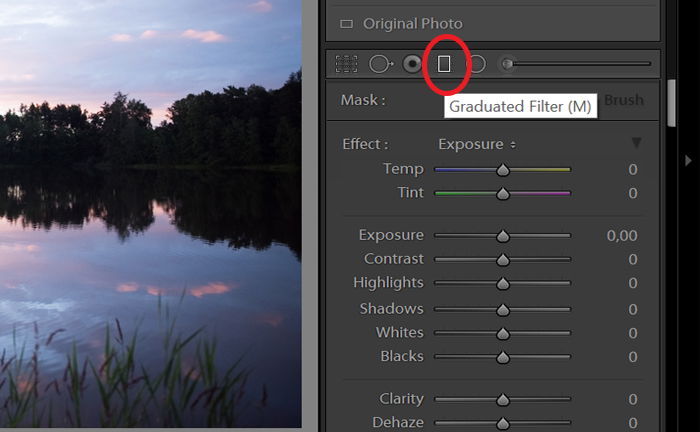
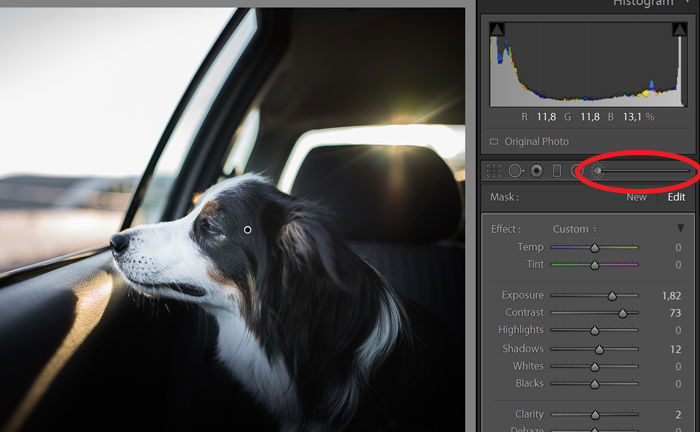
In Lightroom, you have a Graduated Filter tool. This acts the same way as a Graduated Neutral Density filter that landscape photographers use. The basic idea is that it adds a darkness gradient to an area of your image. It is graduated to blend into your image better. This tool, when applied correctly, brings detail out of the sky. To use this, head over to Lightroom and into the Develop module. Under the Histogram, you’ll notice six little icons. The Graduated filter is the 4th one from the left.
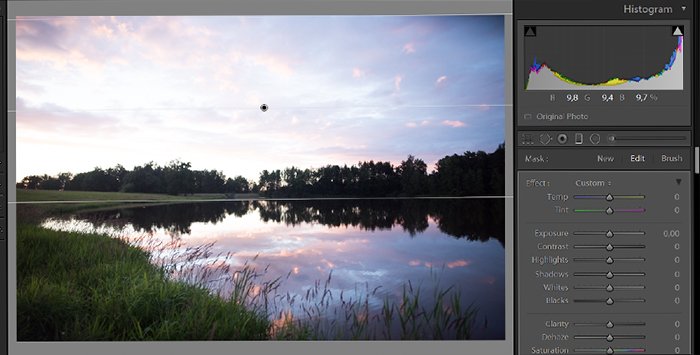
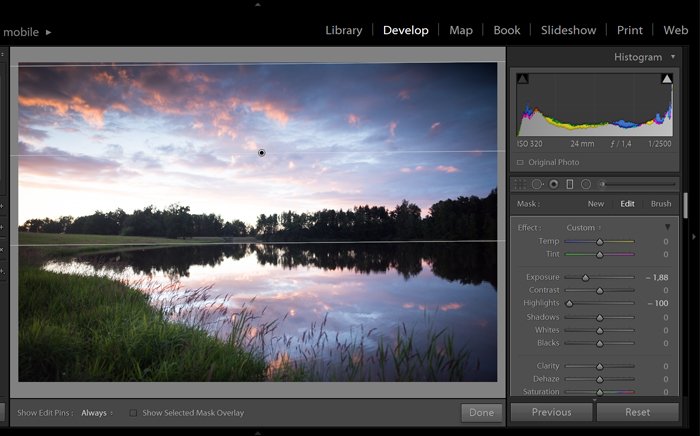
Click on this icon to select it. Next, click and drag downward, where the top would be the most affected area. For a simple landscape with the sky covering the top area, click at the top of the frame and drag down to the horizon.
Now, you are free to change the settings as you see fit, seeing a responsive preview as you do.
Best Post-Processing Tools to Fix Overexposed Photos
Exposure Slider
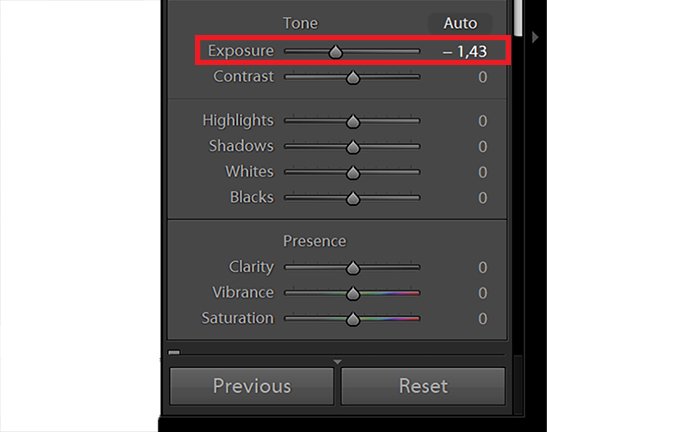
When it comes to post-processing your images, there are several things you can do to fix overexposure. The Exposure slider adjusts the overall brightness of your image. It is fairly sensitive, so go slowly. The numbers you see in Adobe Photoshop and Lightroom relate to the number of stops you can increase or decrease the exposure. Sliding it left makes the image darker, and sliding it right makes it lighter. This may not be the best way to finalize your image, but it is the best place to start. It’s a global action, meaning it affects your entire image. For more local exposure changes, you need to use an Adjustment Mask. If you are shooting RAW, you will have around 4-6 stops of play both ways. This means that you could bring the exposure down to -2 / -3 or up to +2 / +3 without suffering any loss of resolution or quality.
Whites Slider
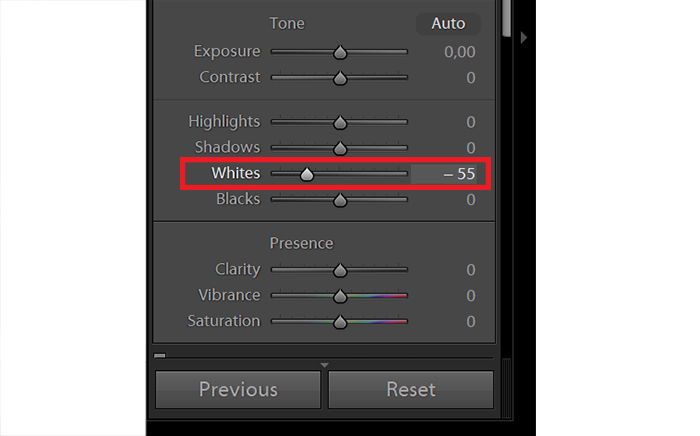
The Whites slider sets the overall brightness of the image too, but by adjusting the midtones. By pulling this slider to the right, you increase the brightness of the midtones. When you pull it to the left, you take the brightness of your midtones down. There is a lot of contrast in those midtones. If you go too far, you’ll suck the life out of the light areas instead of bringing out detail.
Highlights Slider
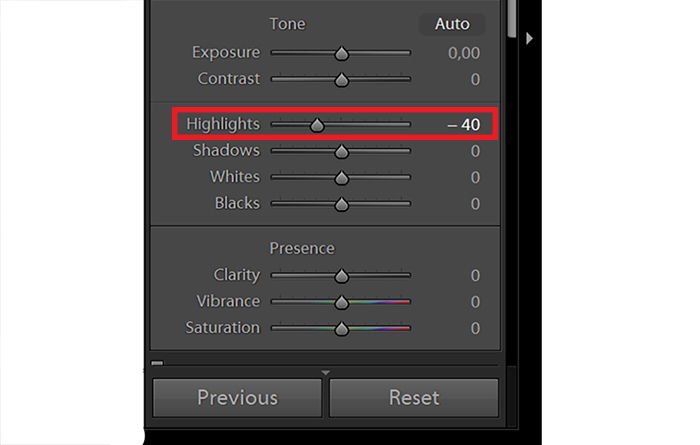
Highlights are the brightest areas of your image. This slider can really help to recover that last bit of detail in a burnt-out area. You can play with the slider with a 200-degree range. It allows you to go to -100 and +100. This might be your last resort.
Using These Tools to Fix Your Image
You will find that moving one of the above three sliders will bring down some of the exposure, but not entirely. They work together in bringing the best out of your image.
For me, I work globally first, and locally second. This means I decrease the Exposure value first. Then I go for the Whites, and if that doesn’t fix the problem, I go to the Highlights.
After that, if there are any areas of my image that are too dark, I use the Adjustment Brush to paint them back in.
This is the process I apply when the overexposed areas of my image make up more than 33% of my image. If the overexposed area is less, I use the Adjustment Brush. This lets me bring detail out in lighter areas, acting locally rather than globally. This workflow will depend on your scene and how you work. But it’s a good start for combating overexposure!
Conclusion
Getting the exposure right is something that even professional photographers sometimes struggle with. Luckily, there are ways to fix overexposed photos. Whether it is in-camera or during post-processing, you can turn to different tools to help you with overexposure. Check out our Effortless Editing with Lightroom course to master your post-processing!
